Reservation book
Reservations Book is the main section of the Reservations module of Zeus Manager. Here you can manage your online reservations easily ordered by date and time.

Main structure of the Reserve Book
In this section you will see two main contents: the list of reservations and the map of your rooms.
List of Reservations
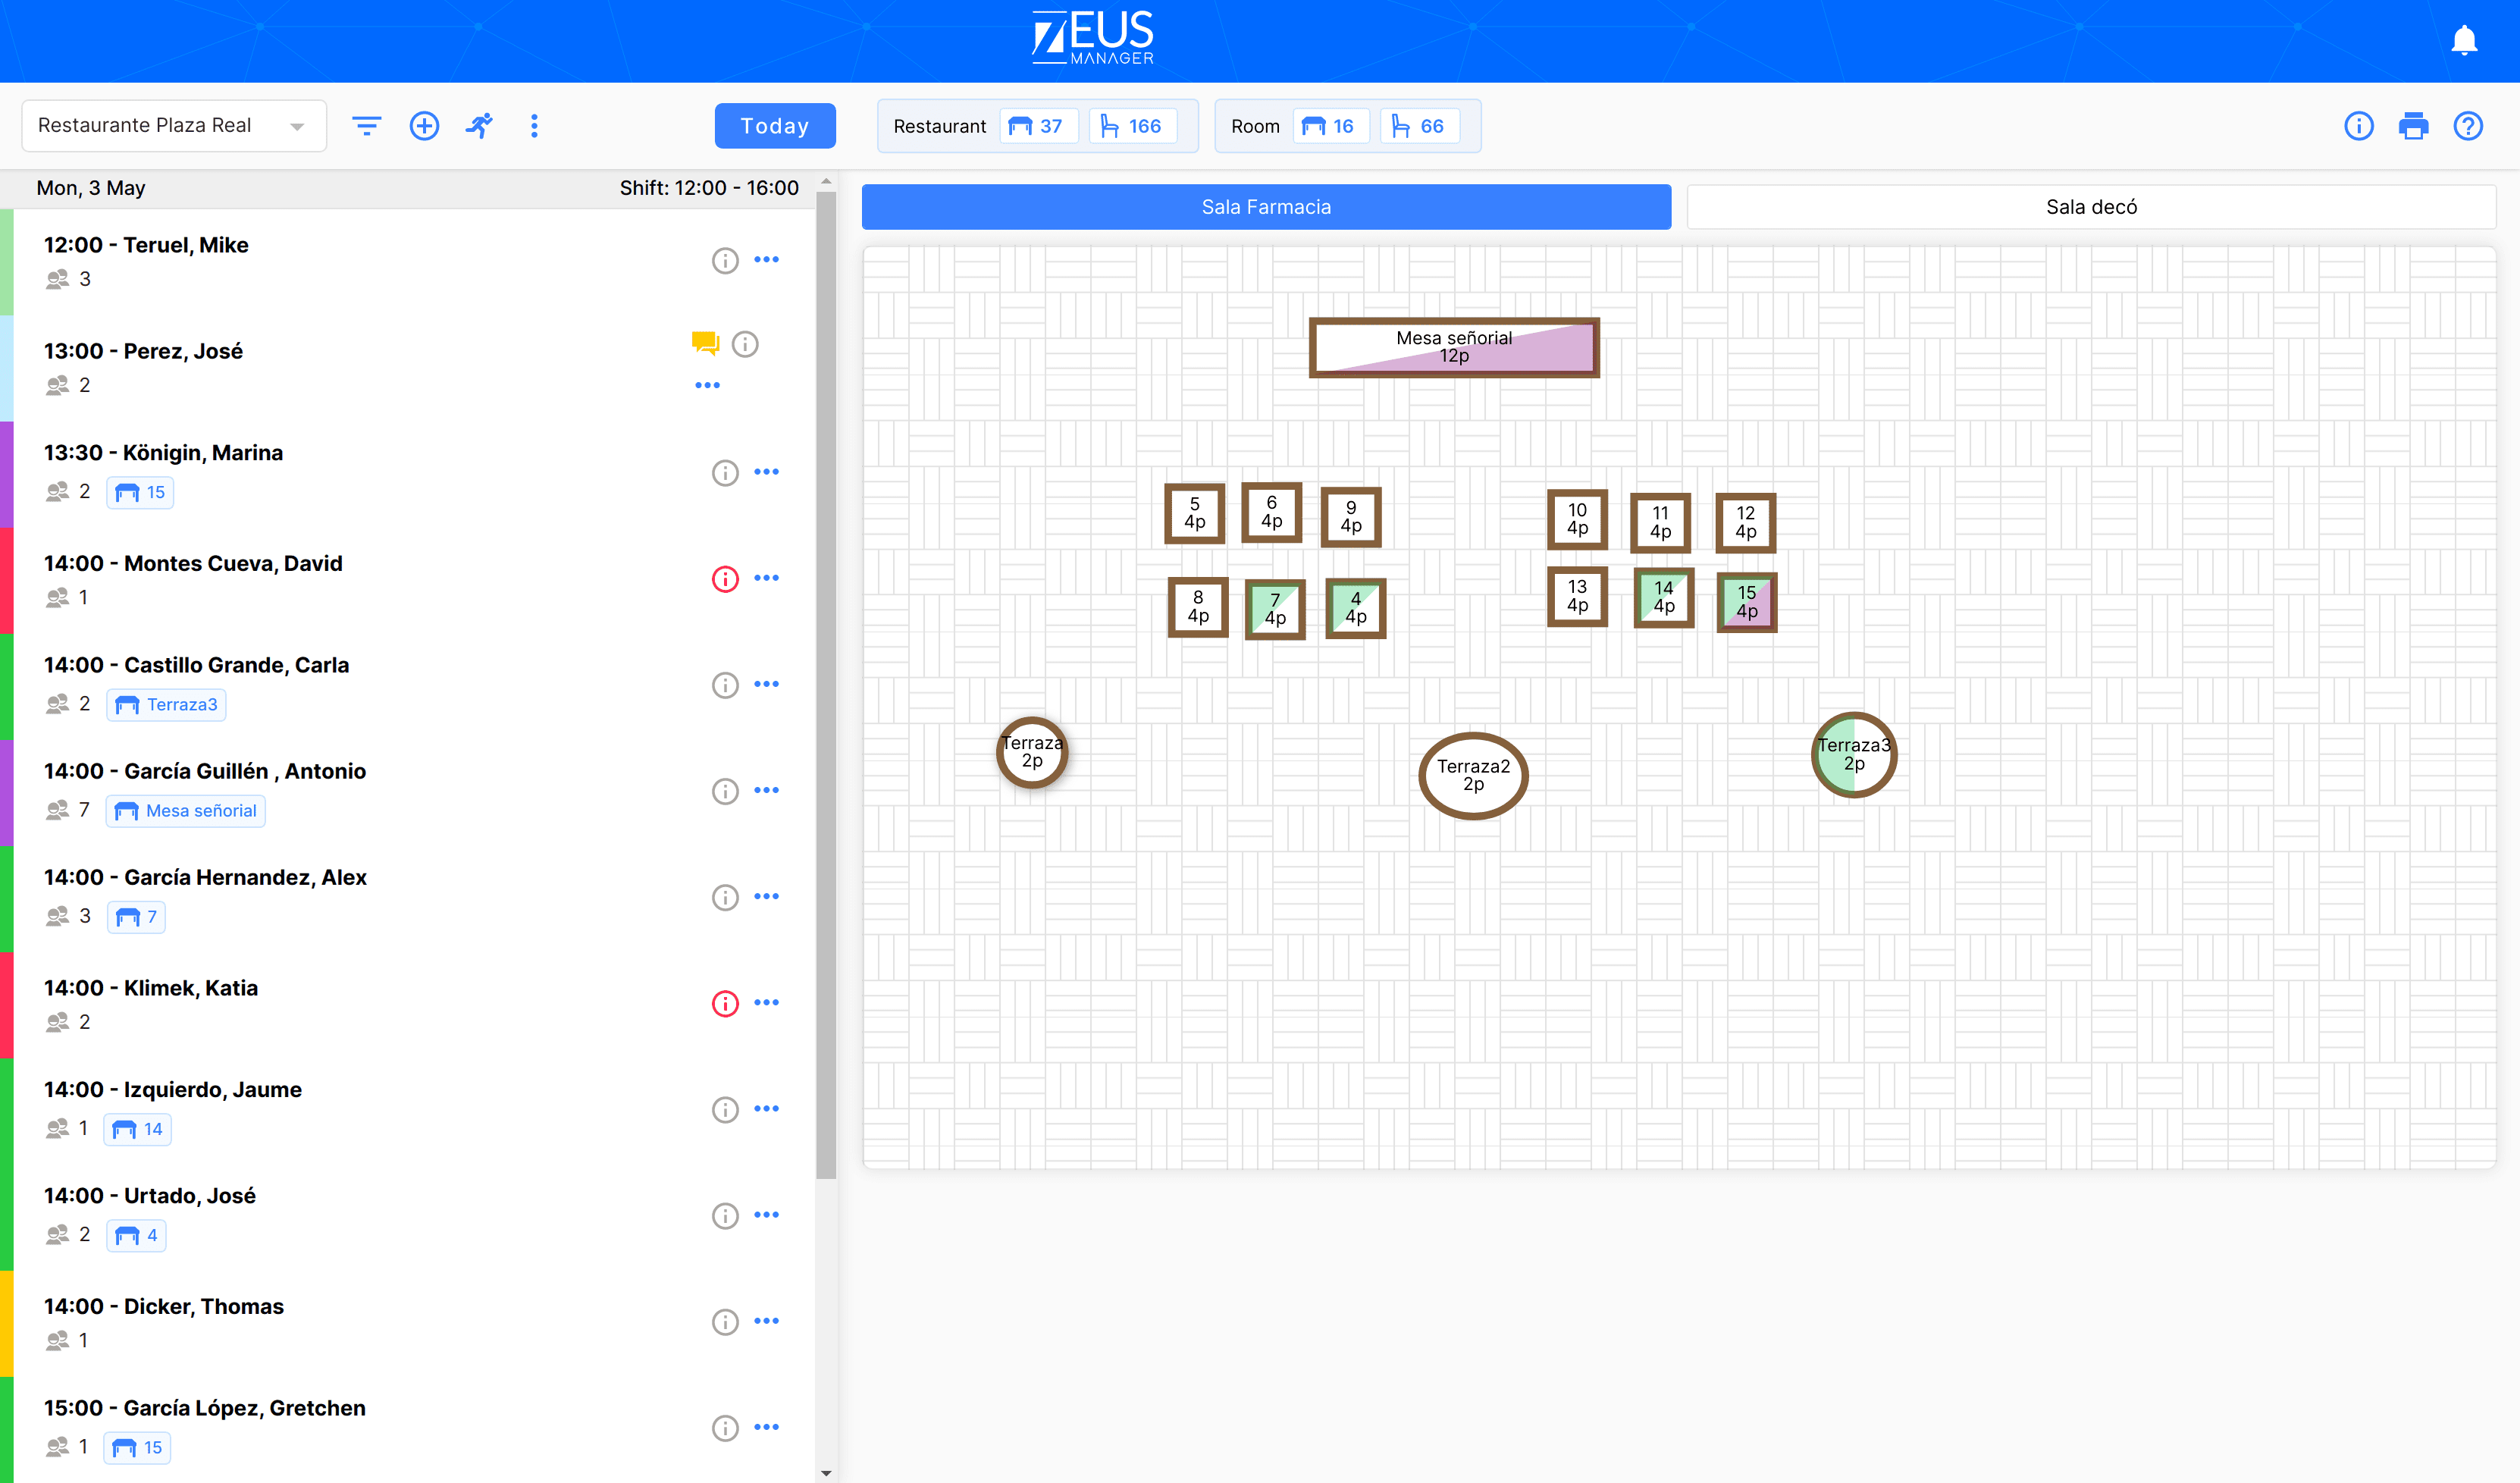
First of all, you have the list of all online reservations that are entering through the Zeus Manager reservations module.
The reservations are ordered by date and time and if you have more than one shift you will also see them broken down. In addition, you will be able to see the number of diners that will come. The i icon that appears to the right of the reservation will provide you with additional information about your client. If you are an occasional customer, you will be able to see the date of the previous reservation, the total number of reservations, the reservations canceled, the amount due and the number of NO SHOWS that you have made. Valuable information that will help you quickly identify possible NO SHOWS and have a better idea of the customer you will receive.
Actions available in the Reserve Book
There are six actions available in the Reservation Book.
- Filter by location: when selecting a location you will see the available reservations for it
- Reservation status filter
- Button to create a new reservation
- Button to create a customer entry without reservation in the list
- Button to view the monthly calendar of reservations
- TODAY button which will position you first place the reservations available for today
- Button to print the reservation list
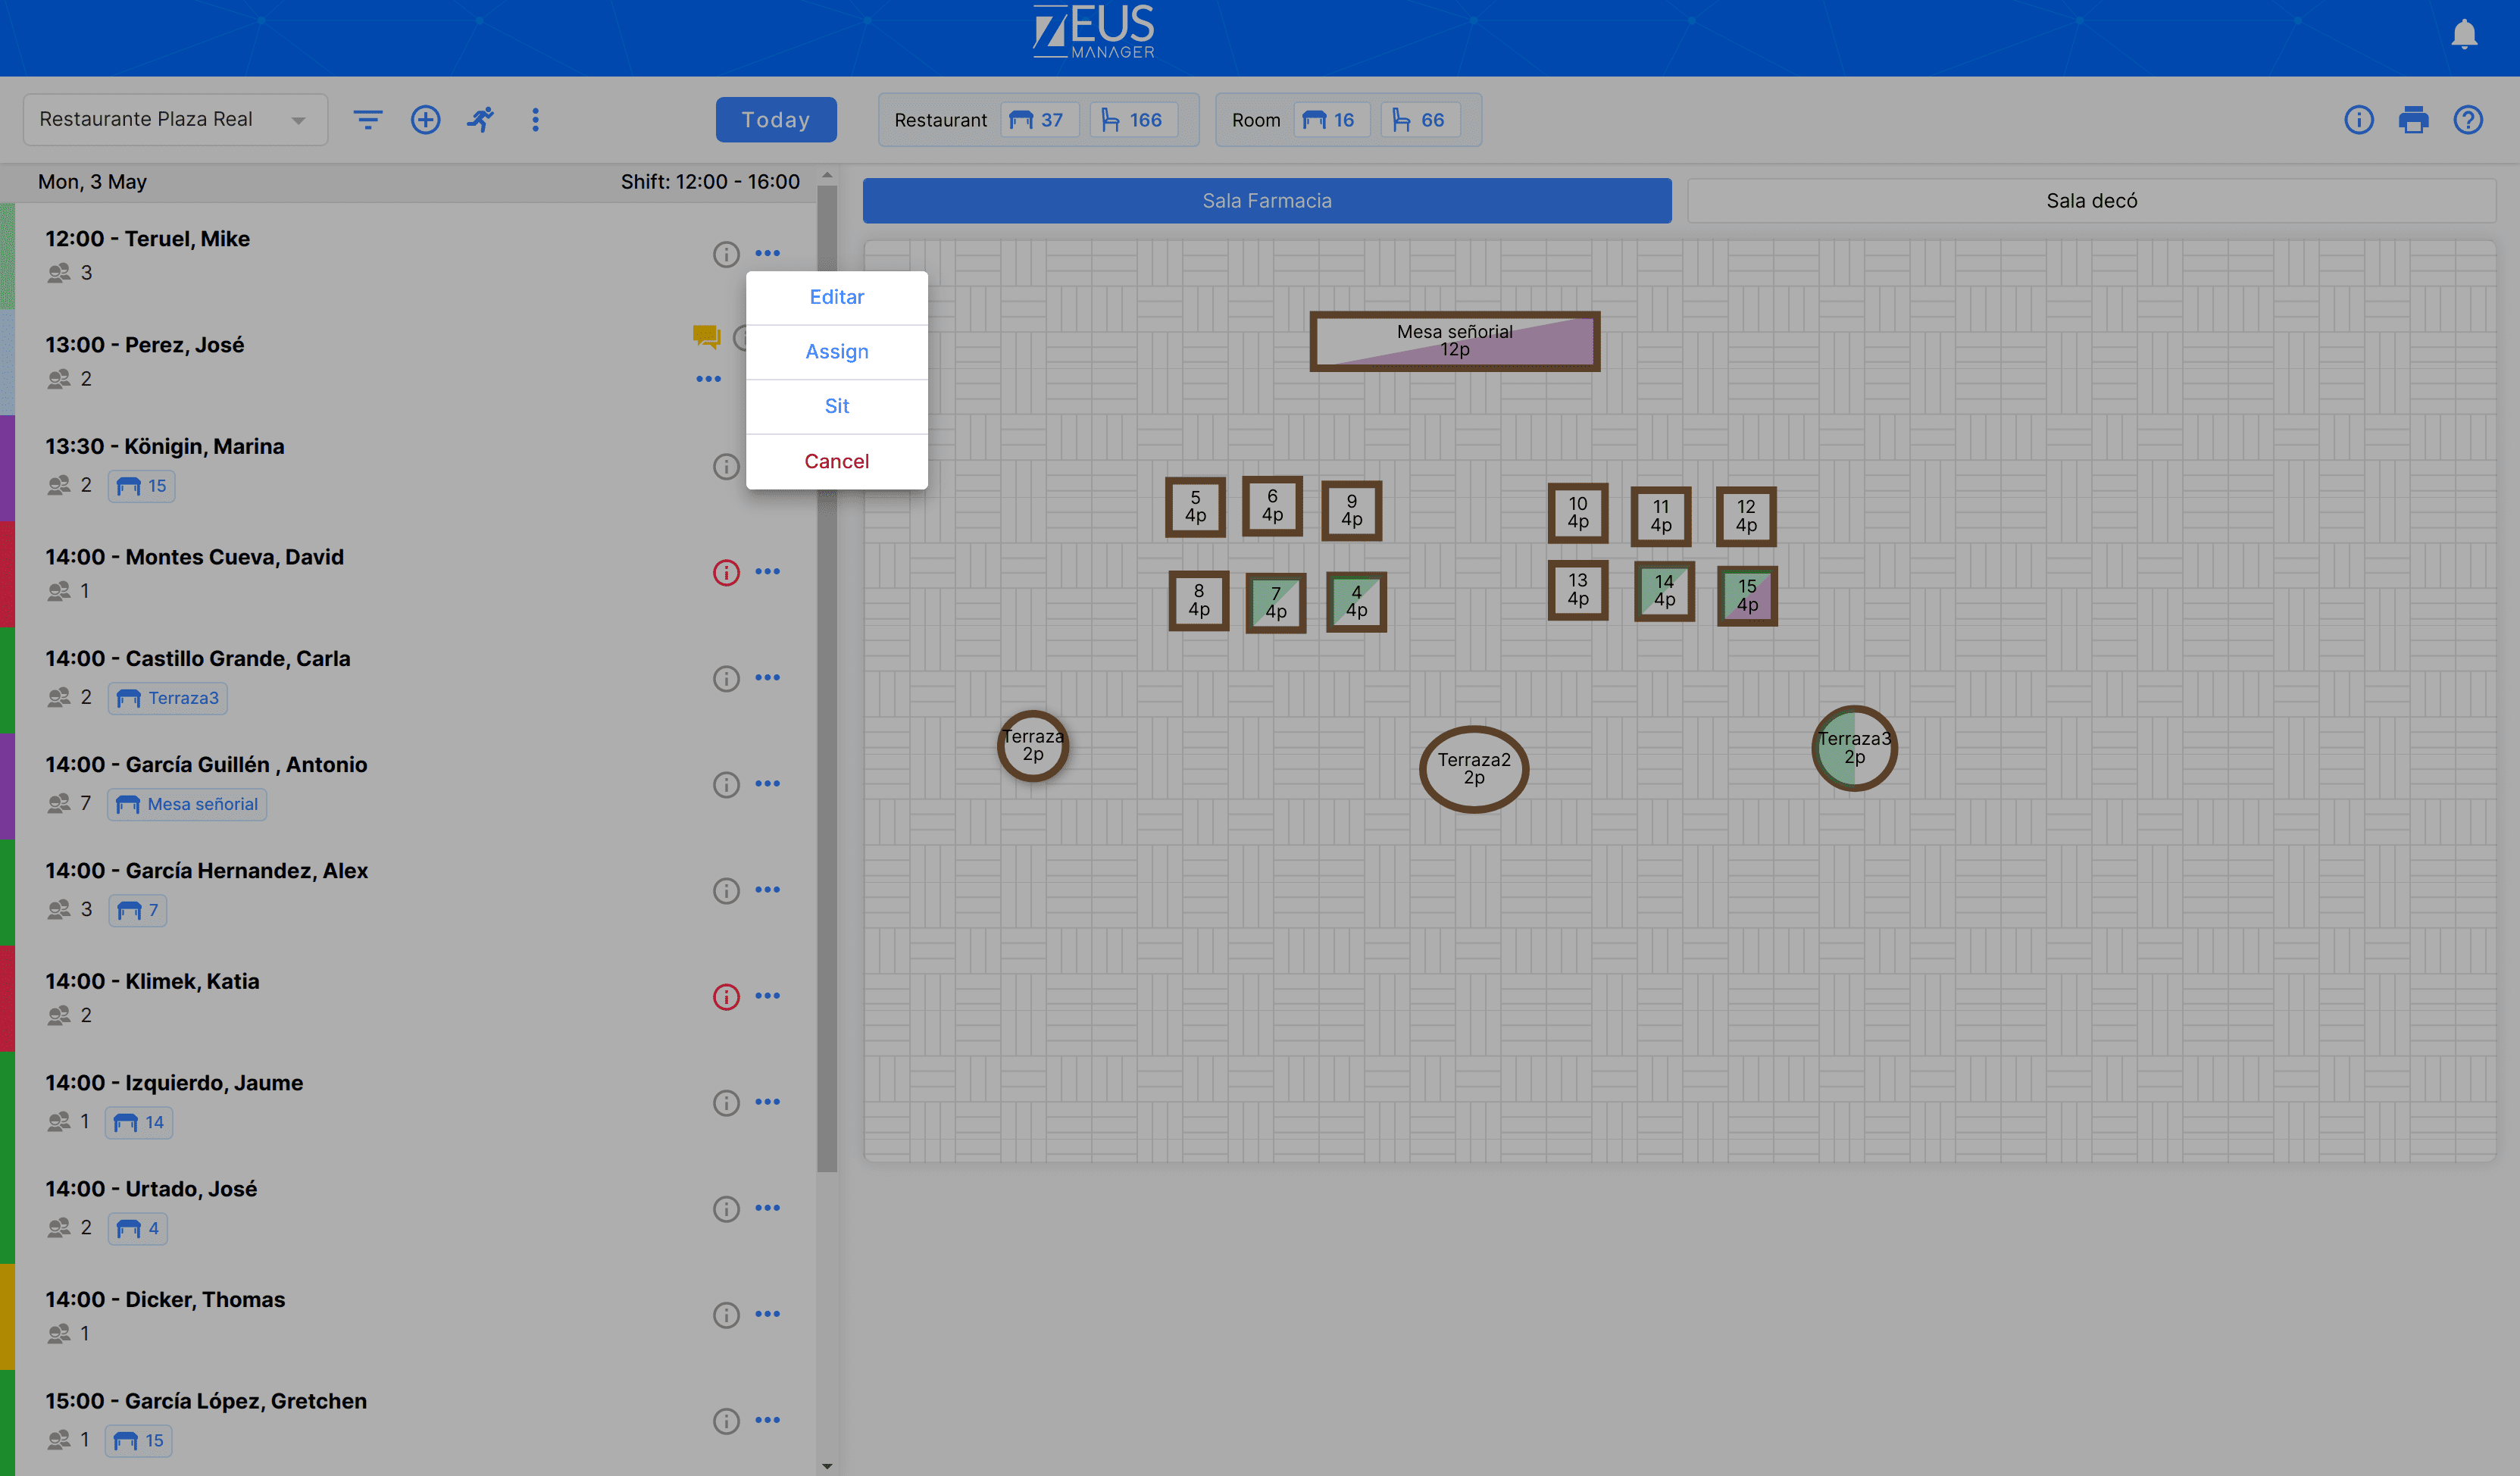
How to manage the status of reservations
You have several actions available to manage your reservation and change its status. The initial status of a new reservation is “ Confirmed without table “.
First select the reservation with the mouse and move it to the right. You will see two additional options appear “ Assign ” and “ Sit “. If you slide to the left, the option to “ Cancel ” will appear. On mobile devices or tablets, simply move it with your finger to see the options.
Each reservation has a color assigned. The initial state “ Confirmed without table ” is light green. You have up to a total of 8 states available:
- Pending (yellow)
- Not confirmed (orange)
- On waiting list (orange)
- Confirmed without table (light green)
- Confirmed with table (purple)
- Seated (green)
- Bypassed restaurant (red)
- Bypassed customer (red)
- Released (light blue)
In the section “ Edit Reservation “we will teach you how to manually modify these statuses. Depending on the state it has, when you swipe to the right you will see some options or others.
Assign table and sit
The main action that you must do first to correctly manage your reservation will be assign table . Once you select it, you will see that the save and cancel buttons appear on the map of your premises. Simply click on the table where you want to assign the reservation and you will see that it changes color. Save the changes and once the guest arrives, you can seat him following the same procedure.
Rooms

On the right you will see the map of the room. From “ Settings> Local> Rooms “you can create as many rooms as necessary. Once you have your rooms, you can select it using the buttons at the top of the room map. You can only interact with the map to assign and seat diners. By following this process you will be able to have a very visual image of all your reservations and thus efficiently manage the different shifts.
Additional information (links to other sections)
- Integrate the module reservations on your website or social network
- Create or edit a new reservation
- Create your rooms in your local configuration
Como podemos ayudarte?
Zeus Manager es el mejor software de gestión RRHH y reservas para restaurantes. Hemos elaborado este manual para resolver todas tus dudas. Pero si deseas contactar con nosotros, puedes hacerlo mediante en el siguiente formulario y te responderemos en las siguientes 24 horas. Gracias por confiar en nosotros.